Introduction
I've taught several wheel building classes thus far, and this is how I go about explaining it.
Think of it as writing a paper.
You dont try and make it absolutely perfect on the first go-round, unless you like spinning your wheels (ha!)
you do multiple drafts.
same with wheel building.
basically, you have four basic parts to each draft.
- Lateral true
- Radial True
- Tension release
- Tighten everything
you need to work dishing in there, of course, and tensioning becomes an issue once the wheel gets about midway to finished. but then, i tend to build my wheels kinda loose, because i have issues with rounding off of spokes. as i become a better wheel builder, I will become a better wheel building teacher.
another point i like to hit is that when tightening everything, or doing anything to the entire wheel, do first one side, then the other. that way, if you fuck up and, say, overtighten, you're not striping spoke nipples in the middle of it and then having to start all over. if you do one side first, you'll know whether that was too much without screwing too much up, and you'll still be able to back everything off.
it's important to stress the PROCEDURE. you apply a procedure over and over again until things are straight.
it's science only insofar as we can compare finished products and see whether, say, higher tension wheels last longer, or give better power transfer, or whatever. the art is in getting to that point.
Readme
Let's start with some vocabulary and misconceptions about building wheels.
Okay. I'm imagining that if you are reading this you have never built a wheel before, or you are a bit confused about building wheels. Let's clear a few things up:
- Building wheels is not rocket science.
- Building your first wheel requires patience. See [Tensioning The Wheel>WheelsPartIII] for details.
- Some people assume that the first wheel that they build is going to be crappy. Not so! What makes a wheel crappy is that you rush through it or use crappy parts. Your first wheel should be built on a solid hub with brand new spokes and a brand new rim.
- Experience truing wheels is good to have before building a wheel.
- Spokes come in various ~~gauges~~. Higher gauge means thinner spokes. 14-gauge is the most common size. 15-gauge is lighter but slightly weaker and also common.
- Beyond their guage, spokes come in many different profiles. For example, spokes can be "butted." That is, they are thick at the ends a thin in the middle. Spokes are sometimes "aero" meaning that they are bladed. If you are curious about the myriad spoke profiles, go to your local shop and geek out with the mechanics.
- Rear wheels typically have two different spoke lengths, shorter ones for the drive side and longer ones for the non-drive side. This is because more space is required on the drive side for the gears. Stare at a rear wheel for a while and you'll see what I mean. This fact does not make the rear wheel any more difficult to build.
- People often want to build their first wheel from a used rim and used spokes that are lying around. I strongly discourage this. One reason is that if a rim has been separated from its hub for any reason, it's usually because the rim is trashed. Another is that building a good wheel from used parts requires more skill than building a wheel from new parts, so you should build a number of new wheels before building used ones.
- Unlike spokes and rims, used hubs are generally solid. However, they must be spaced properly and adjusted properly. Sometimes I catch people lacing up a wheel when the hub has no guts! You can't true the wheel if the hub doesn't have an axle in it!
Some Observations About Wheels
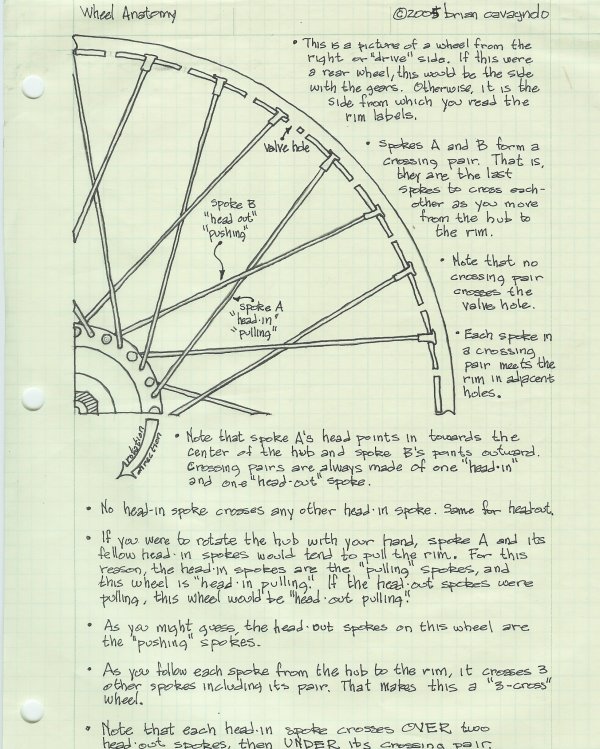
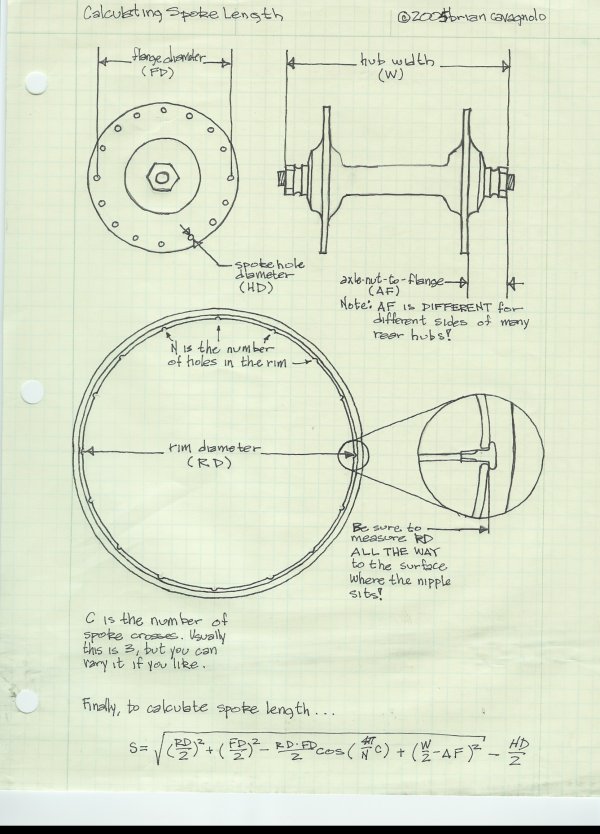
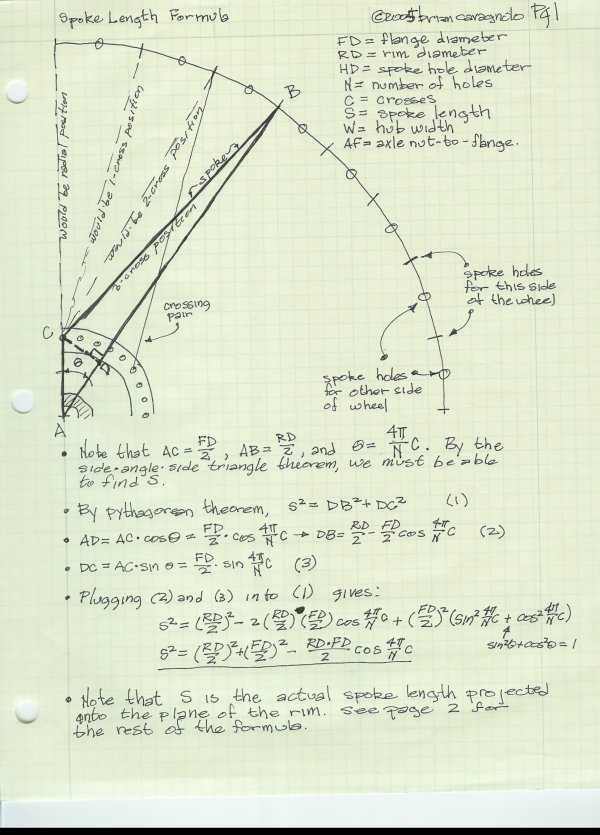
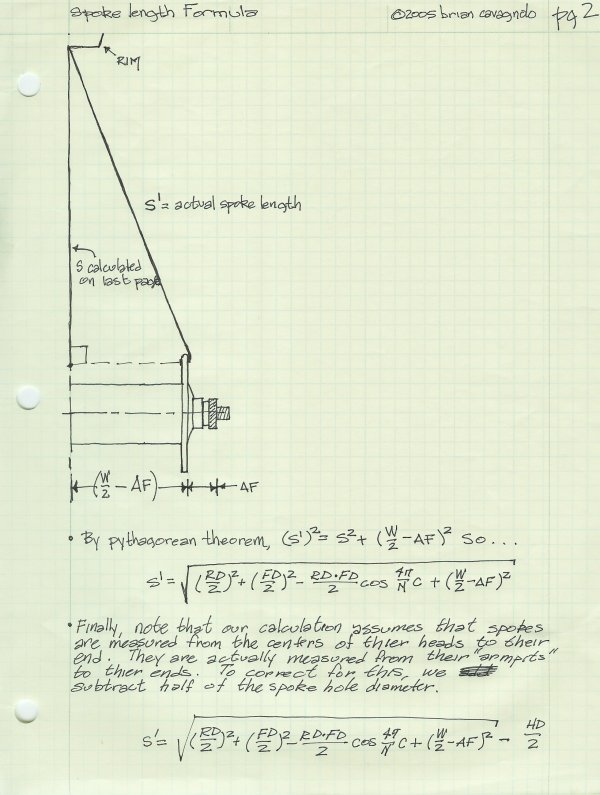
This section shows some observations about wheels, how to calculate spoke length, and a derivation of the spoke length formula for folks who like math.
Lacing the Wheel
This section discusses how to get all of the spokes in all of the right holes with all of the labels facing all of the right ways.
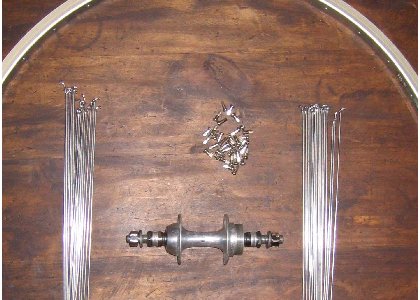
Okay. You've got a hub, a rim, and some spokes and you're ready to lace them all together. Throughout these notes, I'll be building a rear wheel. Note in the picture above how I have two piles of spokes. The ones on the right are the shorter drive spokes, and the ones on the left are the nondrive spokes. Be sure to keep them separate. If you are building a front wheel, all of the spokes are the same length and you don't have to worry about this.
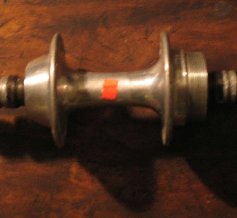 |
Hold the hub in your hand. If there's a decal or mark on the hub, face it towards you such that the decal reads from left to right. If you are building a rear wheel, the drive side should be on the right when you align the label like this. This is exactly how the hub will be sitting in the bike. Additionally, when we build the wheel, the decal will show through the valve hole. If you don't have a decal on your hub, don't worry about this little detail. |
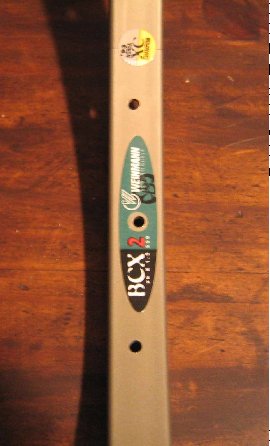
| Now pick up the rim. Hold it such that the labels read from the righthand side. This is how the rim will be sitting in the bike after it is built up. That is, you always read the labels from the drive side of the bike. Many rims have labels that face both directions. For these rims it doesn't matter which side you build as the drive. Note that this makes no functional difference in the wheel. It is merely a convention. |
 |
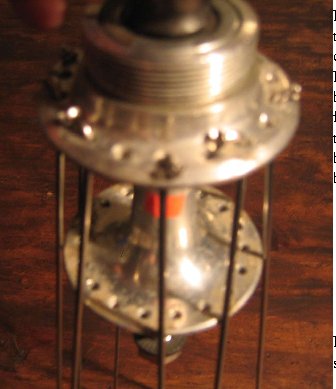 |
Now pick up the hub again and drop in the drive side headout spokes in every other hole. Notice that the spokes from one flange hang between the holes of the other flange. If you think about it, you'll see that this is because on the rim, the holes for one side of the wheel are between the holes for the other side. |
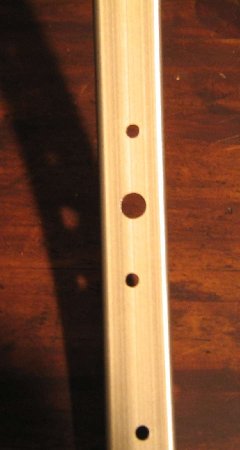
| Having dropped in the head-out spokes on the drive side, we have determined where all of the drive-side spokes will lie. We now have to choose where the non-drive spokes will go. If we randomly choose one of the spoke holes on the nondrive flange to be, say, head-in, the wheel will work just fine, but we may cross a pair of spokes over the valve hole. To avoid this, we have to be sure to choose the right hole. Here's how we do it: hold the rim as if it is already installed on the bike (i.e., drive side on the right.) and look at the valve hole. Notice that one spoke hole is offset to the right and the next is offset to the left. On this particular rim, the spoke hole on top of the valve hole is to the right so we say this rim is "top-to-the-right." Top-to-the-left rims exist but they are uncommon. |
 |
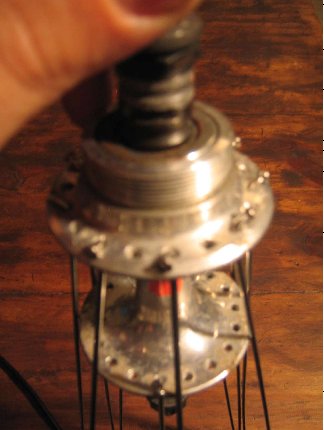 |
Now back to the hub. Holding the hub with the drive side up, the "top" flange is the drive side. Now grab a non-drive spoke. If your rim is top-to-the-right, drop in the spoke such that the "top" spoke is to the right of the bottom spoke as in the photo. If you happen to have a top-to-the-left rim, drop the spoke in such that the top spoke is to the left. Recall that all of this silliness is simply to avoid having a crossing pair cross over the valve hole. |
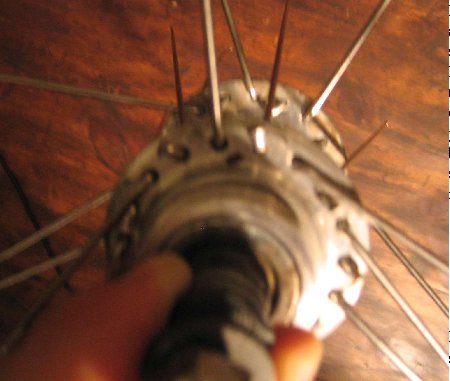
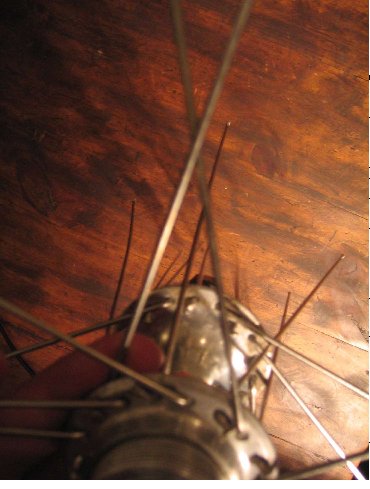
| Now you can drop in all of the spokes. Be sure not to mix up the drive and nondrive spokes. When you are through, the hub will be a somewhat unwieldy mess of spokes. Some people prefer to only put in the drive side spokes at first to avoid this mess. |
 |
 |
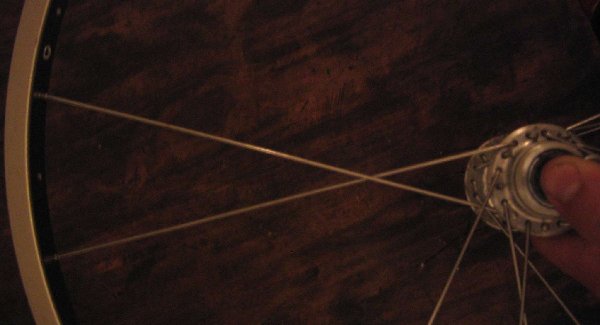
Position the unwieldy mess of spokes such that the hub label (if any) is facing away from you. Choose a headin spoke that is about 2 or 3 spoke holes to the right of the label. This is going to be the pulling spoke of the first pair of spokes that you are going to lace to the wheel. To identify the other (head-out) spoke in the pair, march around to the left, counting headout spokes. For a 3-cross wheel, the 3rd headout spoke is the matching pair. On a 2-cross wheel, the 2nd head out spoke is the matching pair, etc. Now cross these spokes as I have in the picture. Notice that the head-in spoke goes UNDER the headout spoke. You may want to gently bend the two spokes at their elbows so they cross easier. Notice that I have chosen the first pair of spokes assuming that you are building the wheel such that the head-in spokes are the pulling spokes. If you have chosen to build your wheel headout pulling, adapt this step accordingly. |
 |
| You are now ready to install the first pair of spokes. They go in the 1st and 3rd hole to the right of the valve hole if your rim is top-to-the-right and in the 1st and 3rd hole to the left of the valve hole if your rim is top-to-the-left. Be sure that the rim is positioned such that its drive side and the hub's drive side are on the same side. |
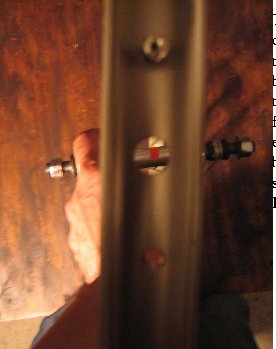 |
Take a peek through the valve hole at the center of the hub, as shown in the photo. Do you see the hub label? If you feel like the label can be better lined up with the valve hole, you may want to choose a neighboring pair of spokes as the first pair. Note that this convention does not effect the functionality of the wheel. Be sure to position the hub as if all of the other spokes are installed to get a truthful observation. |
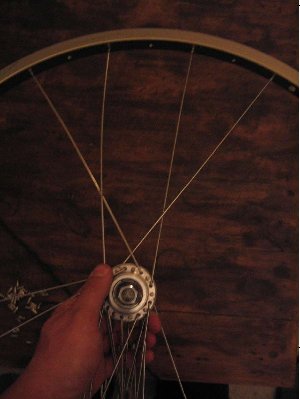
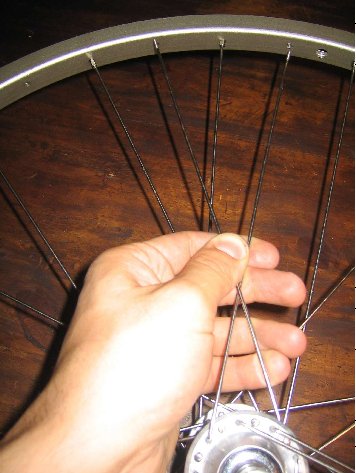
| Now you can march around the wheel installing the other spoke pairs on the drive side. Be sure to skip the non-drive holes in the rim. One common mistake is to put the drive spokes in the nondrive holes. |
 |
 |
After you finish the driveside pairs, turn the wheel over and choose any head-in spoke. This is going to be the pulling spoke of the first pair of nondrive spokes that you will install. If you built your wheel headout pulling, be sure to pick a headout spoke. Now find the match to your spoke. If you're building a 3-cross wheel, its the 3rd headout spoke to the RIGHT of the headin spoke that you chose. Recall that on the drive side, the matching spoke was to the LEFT of the pulling spoke. This step often feels a bit backwards, but if you do it wrong, the wrong spokes will end up as the pulling spokes, and a pair of spokes will cross the valve hole. After you have identified the first pair of spokes, you'll see that they only fit sensibly in one pair of holes. You can now march around the wheel installing the other pairs of non-drive spokes, and you're done lacing the wheel. |
Tensioning the Wheel
This section discusses techniques for slowly building up tension in the wheel while monitoring dish, round, and true.
A good wheel has 4 properties: It is true, it is round, it is in dish, and it is at the proper tension. True means that as you spin the wheel it does not wobble left and right. Round means that when you spin the wheel it does not wobble up and down. A wheel is ~~in dish~~ when its rim is centered between its hubs lock nuts. This implies that when the wheel is in the bike it will be right in the center of the frame instead of hugging one side. Finally, after the wheel is true, round, and in dish, you must ensure that the spokes are at a suitable tension. In the following step-by-step guide, I assume that you have trued a few wheels and know the anatomy of the truing stand. I'll try to add pictures in the future, but for now it's just boring text.
Step 1: Oil: Put the laced wheel in a truing stand and drop a bit of oil on the threads of each spoke. Also put a bit of oil in the spoke nipple seat where the spoke touches the rim. Start with a spoke by the valve hole so you know when I've oiled all of them.
Step 2: Getting Started: Tighten each spoke until only a couple of threads are show beyond the spoke nipple. This ensures that all of the spokes are approximately the same length. If the spokes are still so loose that the rim rattles around, you may wish to go around a second time and tighten each nipple a couple more turns. In deciding whether or not to go around the rim a second time, keep in mind that the spokes should ~~not~~ be tight, but they should be affect the position of the rim.
Step 3: Truing: You are now ready to true the wheel. Start by opening the jaws of the truing stand wide and give the wheel a good spin. Take a minute to observe how far out the wheel is. It's probably wobbling back and forth a good amount. As the wheel continues to spin, let the jaws in slowly until you ~~hear~~ them barely touch the rim. Don't use your eyes for this part. Keep spinning the rim and adjusting the jaws until you are certain that they are only touching in one or two places, and only touching a tiny bit. Now gently slow the rim down and find the spot that is touching the jaws. Tighten the proper spoke about a half turn and give the wheel a spin. The wheel should no longer touch the jaws. With the wheel spinning, let the jaws in a bit more until you hear the next highest spot on the rim and repeat this incrimental truing process. After a while, the wheel should be practically centered in the truing stand, practically touching both sides of the jaws. The keys to truing the wheel well are to only make small changes, even if one spot seems to be way far out.
Step 4: Dishing: At this point, your wheel is true, but not round. It may or may not be in dish. To check this, you need a dishing tool. I will assume you know how to use a dishing tool, because an explanation in words would be really boring. Anyhow, if your wheel is in dish, this implies that the jaws of the truing stand are centered between its legs. This is great. You can move on to the next step. If your wheel is out of dish, this implies that the jaws of your truing stand are not centered between its legs. In this case, I recommend adjusting your truing stand and repeating Step 3 until the wheel is in dish.
Step 5: Evaluate Tension: Starting at the valve hole, move around the wheel squeezing the spokes. They should still be notably tighter than they were after Step 2, but not so tight that you would be comfortable riding on the wheel. You may wish to feel the spokes of a wheel that you trust to calibrate. It is not uncommon for beginners to end up with a wheel that is slightly tight at this stage of the process. If, in your estimation, the wheel is approaching its final tension, you should probably go around the rim once or twice, loosening each nipple a half turn. If you're careful, this should not affect the true of the wheel. If it does, return to Step 3. The reason that it is important not to have the wheel too tight at this stage is that making the wheel round increases the tension quite a bit. Trying to round the wheel when it is kinda tight will reduce your control over the tension later.
Step 6: Rounding: Okay. Let's review where things are. Your wheel is round and in dish. The tension is greater than it was when you started, but not so great that you would dare ride the wheel. We are now going to make the wheel round. This procedure is not much different than truing. Start by adjusting the jaws of the truing stand so that they sit just ~~below~~ the rim. Give the wheel a good spin, and slowly let the jaws up until they barely touch the rim. You have identified the highest spot in the rim. Tighten the two spokes (one on the left side, one on the right) that are closest to this high spot. Be sure to tighten them just a bit. Your goal is not to make the high spot perfectly round all at once, just to make a small improvement. Give the wheel another spin and the high spot should be gone. Now the wheel is incrementally more round. With the wheel spinning, let the jaws up a bit more and find the next highest spot and fix it. If the high spot ever seems to span more than a couple spokes worth of the rim, you probably have to back off the jaws a bit. As you make the wheel more round, you should also keep your eye on the true. If the true starts getting out of wack, you can switch to truing for a while and then switch back to rounding.
Step 7: Tensioning: By the time you've arrived here, your wheel should be round, true, and in dish. Our technique for making the wheel round and true ~~also~~ has increased the tension. So, your wheel is probably close to ready. To evaluate the tension, you should start by squeezing the spokes of a wheel that you trust. Once you have it in your head what that feels like, squeeze the spokes of the wheel you are building. Are they too loose? Then start at the valve hole and tighten each spoke a half turn. After adding tension, I like to go around the wheel and squeeze the spokes to seat them. After adding incremental tension, you usually must repeat Steps 3 and 6 to bring the wheel back into round and true. You may have to repeat this a few times until the tension is where you want it.
Step 8: Break In: After you have built the wheel, put a tire on it and take it for a ride or two. The spokes will seat and stretch, and the wheel will be affected. After this maiden ride, take off the tire and repeat Steps 3 and 6 to bring the wheel back into round and true. After this, you're pretty much done.
Some Details:
- I recognize that I sort of gloss over the issue of tension in this article. Many wheel builders use tensionometers to check the tension of the wheel. In my experience, these tensionometers are useful for optimizing the tension, and for revealing how uniform the tension in the wheel is. However, you will need some solid intuition before the tensionometer is useful.
- The tension on the non-drive side of a rear wheel is naturally lower than the tension on the drive side. This has to do with the length and angles of the spokes and is nothing to worry about.
- Optimal tension varies with rider weight. A heavier rider's wheels should be a bit tighter than a lighter rider's.
- When building wheels (or when truing them, for that matter), never loosen single spokes to make the wheel true. If you go about loosening some spokes while tightening others, you are introducing non-uniform tension in the wheel, which will weaken it dramatically.


